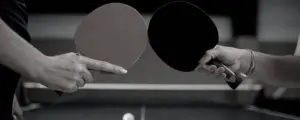
Whether it’s for new rackets or replacing downplayed rubbers, gluing new rubbers is one of the basics for any ambitious table tennis player. BUT don’t worry if you’re haven’t done it before. In this post, you will learn step by step how to glue properly and the things you need to pay attention to.
To start, here’s an overview of each step:
- Apply glue to the rubbers
- Coat the wood with glue (then the rubbers again if necessary)
- Let dry for 2-3 hours
- First position the covering in the middle with little pressure
- Then press down evenly from bottom to top
- Cut the rubber to size
- Repeat on the other side
You can find out exactly how to proceed with the individual steps in detail in this article.
Overview of the post:
What do you need to glue table tennis rubbers?
Before you start, you should first make sure that you have all the necessary items at hand. Some of them are mandatory, others are rather optional.
Necessary accessories for gluing
- Glue (preferably water-based and solvent-free)
- Blade
- Rubbers (forehand and backhand)
- Sponge (or brush) for spreading
- Scissors or carpet knife
Optional accessories for gluing
- Rubber Roller
- Edge Tape
Are you still missing something?
If you are still missing accessories, you can put together an assembly set that meets your needs here at Megaspin.
Is everything ready? Then you can start.
How to clue table tennis rubbers? – Step by step instructions
If you want to change your rubbers, you must of course first pull the old ones off the wood. I’ll explain how to do that further down in the post.
When this is done, place all the necessary items in front of you on a table.
- Apply glue to the rubbers
To do this, place the rubbers face up on the table in front of you. Then put a small amount of glue (about a teaspoon) in the center of the rubber. Next, use a sponge to spread the glue evenly over the entire back of the rubber.
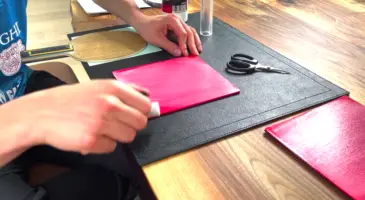
Tip: Dip the sponge into the glue first and carefully cover the outer edges and corners of the covering. Then “paint” the rest of the covering evenly.
Important: Make sure that you spread the glue evenly, otherwise there may be bumps that can be noticeable later when playing.
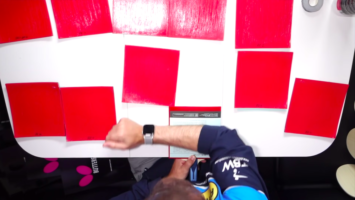
- Apply glue to the blade
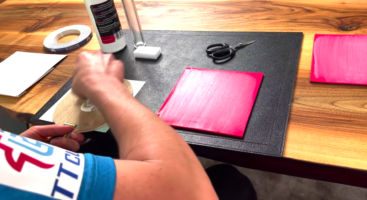
Proceed in exactly the same way as with the rubbers: First, put a small amount of glue in the center and then carefully and evenly spread the glue with the sponge.
Afterward, many players coat the rubbers a second time with glue.
- Wait until the glue has dried
After you have coated both sides of the blade and both rubbers with the glue, you have to wait for it to dry. This takes about 2-3 hours.
If you use a water-based glue (which you should), it should no longer have a milk-like color after the waiting time, but be completely transparent. Then you can start gluing the rubber to the blade.
Important: Before you proceed to the next step, you should check again that no residues of the glue, such as lumps, are visible. These can otherwise cause waves under the rubbers.
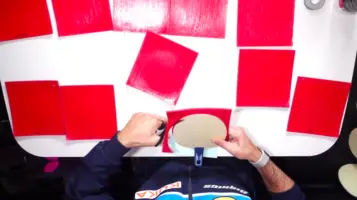
- Position the rubber and press it on lightly
To glue the rubber, place the blade on the table with the handle towards yourself. Then take the rubber and carefully position it in the center of the blade. Make sure that the rubber is perfectly aligned with the edge of the handle.
Then lightly and carefully apply pressure to the rubber. To do this, either use a rubber roller or simply run your forearm carefully over the rubber from bottom to top.
Then check whether any waves or bubbles have formed underneath.
- Glue the rubber firmly in place
Once the rubber has been positioned correctly, you can glue it in place with a lot of pressure. This is important so that the rubber does not move again and no waves or bubbles form under it.
This time, use the rubber roller or your forearm to apply a lot of pressure to the rubber until it sticks firmly and evenly to the blade. Many players also use books to apply pressure.
- Cutting the rubber
There are actually two ways to cut the rubber. I simply use a pair of scissors. But you can also cut the rubber right at the beginning with a carpet knife.
Cutting with a carpet knife
If you use a carpet knife, cutting is the first step in gluing the rubbers. To do this, simply place your blade as a template on the quadratic rubber and cut around it with the knife. This way you get a rubber cutout that fits the blade perfectly.
The advantage of this is that the rubber does not overlap at the end and is therefore less likely to detach from the blade.
Cutting with scissors
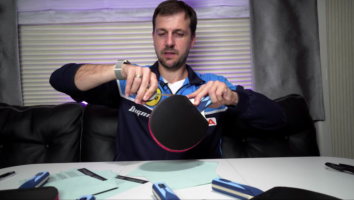
As soon as you have glued on the quadratic rubber, there is still some overhanging from the blade. You can cut this away with a pair of scissors.
Many players, such as Timo Boll, do this because it makes it easier to change the rubber. They leave up to half a millimeter of the rubber protruding.
Important: The rules state that the rubber may not protrude much. The umpire’s manual specifies a tolerance of ± 2 mm.
- Repeat gluing for the other side
Once one side has been glued and cut, repeat the process with the other side. And there you have your finished racket!
Optional: Use edge tape
When you have glued on the rubber, you can optionally protect the racket’s edges with edge tape.
The advantages of this are:
- Fixation of the rubber: They don’t detach so easily
- Protection of the edges: If you often drop the racket or knock it against the table while playing, the tape protects the rubbers and edges.
- Increases the durability of the rubbers
Gluing table tennis rubbers – Questions and Answers
To conclude this article, I’d like to address a few possible questions you may be asking yourself right now.
How do you properly remove old rubbers?
If you want to change your rubbers, you have to remove the old ones first. To do this, carefully and gently pull them off the blade. You should do this less by tearing, but rather as if you were peeling an orange.
In this video, you can see very well how to proceed.
Once the entire rubber is removed, you should thoroughly inspect the wood for possible glue residue, dirt or damage. If necessary, you can clean the wood with a brush. There are even extra glue removers for this purpose.
If there is no more residue and no damage, you can glue on the new rubbers. You have already learned how to do this in the post above.
How do you remove bubbles under the rubber?
In the gluing instructions, I emphasized again and again that you have to be careful so that no air bubbles form under the rubber. Now you may have wondered what to do to remove them if they do occur.
Air bubbles form in places where the rubber is not yet properly stuck to the wood. If you discover a bubble, you should therefore first thoroughly go over the rubber again with the rubber roller or your forearm.
Especially in the case of air bubbles at the edges of the racket, you can usually remove the air quite easily. If this does not help and the air bubble does not go away, you will, unfortunately, have to remove the rubber again and glue it back on.
How can you avoid bubbles under the rubber?
Thoroughness is the key here. Be focused and careful during each step. Gluing is not a race! If you go through the steps one by one as explained above, you should manage to avoid air bubbles.
When do I need new rubbers?
Changing the rubbers can be tempting very quickly if the current ones no longer generate the desired spin. However, one should not be too hasty. Often a thorough cleaning of the rubber is enough. Read this post to find out how to do this.
If this no longer helps or if the rubbers are simply damaged, you should change them.
Is it allowed to apply a treatment to the rubbers in addition to gluing for more grip?
Officially, the rubber may not be chemically treated after assembly. Of course, this only applies to official competitions. If you are a recreational player, there are some ways to make rubbers grippy again.
Click here to find out about them.
Still got questions?
I hope I was able to give you the answers you were looking for in this article. If you still have questions, you might find the right answer in our Q&A section. Otherwise, feel free to ask them using the form below.
Have Fun 🙂